
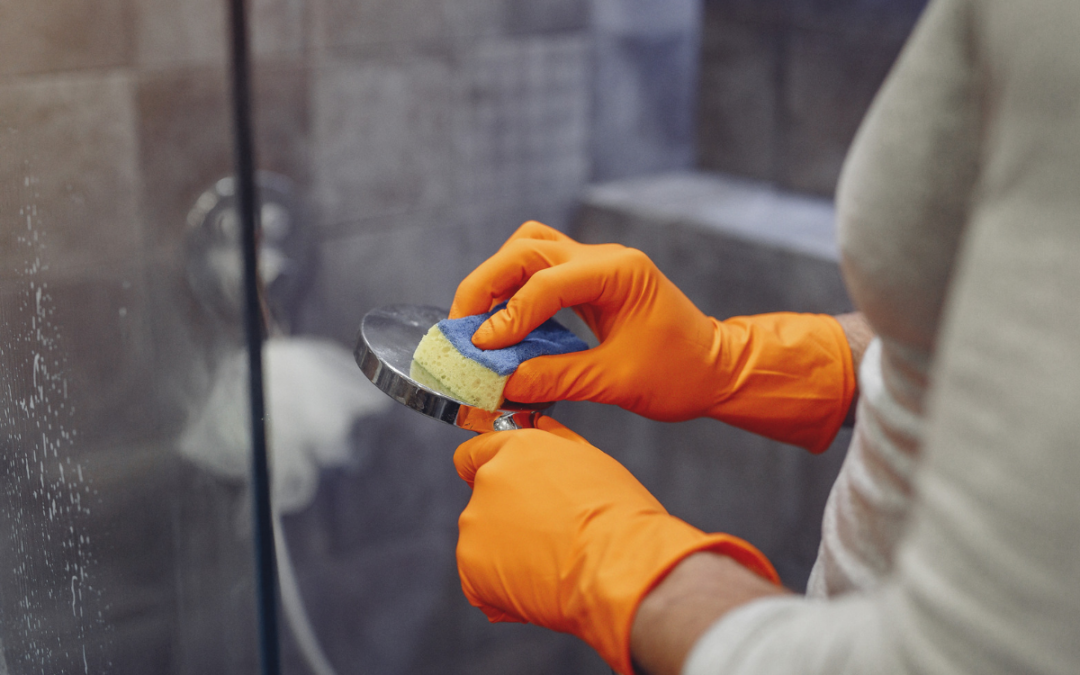
How to Deep Clean a Bathroom Naturally: Professional Tips, Step-by-Step Guide & Checklist
A bathroom can look clean at a glance and still have dust in the corners, hair along the baseboards, soap scum on the shower walls, and grime hiding around the toilet. A proper deep clean tackles those often-overlooked areas and helps keep the room feeling fresh and sanitary.
As a professional cleaner, I’ve learned that the secret to how to deep clean a bathroom is not using a dozen different products. It’s having a good routine, using the right tools, and working in a consistent order.
In this guide, I’ll walk you through how to deep clean a bathroom step by step, including how often to do it, which supplies to gather, what areas are easy to overlook, and a printable-style checklist to help you stay on track.
You don’t need a cabinet full of specialized cleaners to get the job done. A simple, thoughtfully chosen cleaning kit can go a long way.
How Often Should You Deep Clean a Bathroom?
How often a bathroom needs cleaning depends on how many people use it, how frequently it gets used, and how quickly moisture, dust, and grime build up.
Here’s a general schedule to use as a starting point.
Daily or As Needed
Small daily habits can help prevent a bigger mess later.
- Wipe up splashes around the sink.
- Squeegee shower walls or glass after showering.
- Hang towels so they can dry properly.
- Pick up visible hair and debris.
- Empty the trash when needed.
These small tasks only take a few minutes and can make your weekly cleaning much easier.
Weekly Cleaning
For many households, a weekly bathroom cleaning is a reasonable routine.
- Clean the toilet.
- Scrub the sink and countertop.
- Clean the bathtub or shower.
- Wipe mirrors.
- Clean high-touch surfaces.
- Sweep or vacuum the floor and mop as appropriate.
- Empty the trash.
- Replace used towels and bath mats as needed.
Monthly or Periodic Deep Cleaning
A deeper clean helps address the areas that routine cleaning may miss.
- Dust light fixtures and accessible high surfaces.
- Clean the exhaust fan cover.
- Wipe baseboards, trim, and door frames.
- Clean corners and edges around the floor.
- Scrub grout where needed.
- Clean behind the toilet and under the vanity where accessible.
- Remove stubborn soap scum and mineral deposits using products suitable for the surface.
- Wash shower curtains or clean shower door tracks as appropriate.
These are general guidelines, not strict rules. A busy family bathroom may need attention more often, while a lightly used guest bathroom may need less frequent cleaning.
Bathroom Deep-Cleaning Supplies and Tools
Before you start, gather everything you need. Having your supplies within reach makes the process more efficient and helps you avoid repeatedly walking in and out of the room.
Cleaning Tools
- Microfiber cloths for general surface cleaning
- Paper towels for toilet cleaning
- A dedicated toilet brush
- Non-scratch sponge or scrubber
- Small detail brush for tight spaces
- Grout brush, when needed
- Vacuum cleaner or broom
- Mop suitable for your flooring
- Cleaning caddy or bucket
- Cleaning gloves
- Eye protection if required by the product label or cleaning task
Use separate tools for the toilet and other bathroom surfaces. Keep toilet-cleaning tools separate from the cloths and scrubbers you use on the sink, countertop, bathtub, and shower.
Cleaning Products
You can keep your cleaning kit simple. Depending on the surfaces in your bathroom, you may need:
- An all-purpose cleaner suitable for the surfaces you’re cleaning
- A bathroom cleaner for soap scum and buildup
- A toilet bowl cleaner
- A glass cleaner or suitable glass-cleaning solution
- An appropriate disinfectant for high-touch surfaces
- A floor cleaner compatible with your flooring
I prefer a more minimal approach to cleaning products, choosing practical products that work well without adding unnecessary chemicals or fragrances to my routine.
You don’t need a separate product for every single surface. However, it is important to choose cleaners that are appropriate for the materials you’re cleaning.
A Few Important Cleaning Safety Tips
“Natural” does not automatically mean harmless, and stronger does not always mean better.
- Never mix cleaning products. In particular, never mix bleach with vinegar, other acids, ammonia, or other cleaners.
- Read product labels before use and follow the directions.
- Provide adequate ventilation when cleaning.
- Test an unfamiliar product on a small, inconspicuous area first.
- Avoid using acidic cleaners such as vinegar on acid-sensitive natural stone, and use caution with cement-based grout.
- Follow the disinfectant label’s instructions for surface compatibility, application, and contact time.
- Be careful around electrical fixtures. Never spray liquid directly onto light switches or electrical components.
- Use products and tools that are appropriate for the specific surface.
For more information, see the CDC’s guidance on cleaning and disinfecting your home and the EPA’s Safer Choice program.
How to Deep Clean a Bathroom Step by Step
The order in which you clean matters. I like to work from top to bottom, moving clockwise around the room in an “S” pattern. This gives me a consistent route to follow and helps prevent me from missing areas or cleaning the same spot twice.
Another important rule: remove loose hair and dust while they’re dry, before introducing water or cleaning products.
Step 1: Declutter the Bathroom
Start by clearing the surfaces you’re going to clean.
Remove items from the countertop, move toiletries out of the way, and pick up bath mats, towels, trash, and anything else that might get in your way.
Put items somewhere clean and dry while you work. If a product or container has collected grime, wipe it down before returning it to its usual place.
Professional tip: Decluttering first gives you access to the entire surface instead of forcing you to clean around bottles and other items.
Step 2: Vacuum or Sweep Up Hair and Loose Debris
Before using any wet cleaning products, vacuum or sweep the bathroom floor to remove loose hair, dust, and debris.
Pay particular attention to:
- Corners and edges
- Along baseboards
- Around the toilet
- Behind the toilet, where accessible
- Under the vanity, where accessible
- Around the base of the tub or shower
Hair is much easier to remove when it’s dry. Once it gets wet, it can stick to the floor, cling to a mop, or become harder to gather.
This small step makes the rest of the cleaning process easier and helps keep loose hair from spreading around the room.
Step 3: Work From Top to Bottom
Now begin cleaning the room from the highest accessible areas downward, following your clockwise route.
Depending on the bathroom, this may include:
- Accessible light fixtures
- Upper corners where dust and cobwebs collect
- The exhaust fan cover
- Shelves and ledges
- Cabinet fronts
- Door frames and trim
- Baseboards
Use a suitable tool to remove dust and debris without damaging the surface. Be especially careful around light fixtures and electrical components. Don’t spray cleaner directly onto them, and don’t clean electrical fixtures with wet tools unless the manufacturer specifically permits it and the area can be made safe. When cleaning light fixtures and exhaust fans make sure they are turned off. Cleaning a glass light fixture when it is hot can be hazardous as well as cleaning a moving fan.
Working from top to bottom helps prevent dust and debris from landing on surfaces you’ve already cleaned.
Step 4: Scrub the Toilet, Sink, and Tub or Shower
Next, tackle the main bathroom fixtures.
I like to scrub the inside of the toilet, sink, and tub or shower before moving on to the final detail work.
Clean the Toilet
Use your dedicated toilet brush and toilet-cleaning products for the bowl. For the exterior, use paper towels and an appropriate cleaner or disinfectant according to the product label.
Pay attention to the seat, hinges, exterior surfaces, base, and other areas where grime can accumulate. I also like to unscrew the toilet seat and lid to clean under the hinges. and don’t forget to get the entire base of the toilet even around the bolts that hold the toilet seat on to the toilet. While you are cleaning the toilet go ahead and clean the floor around the toilet as well as the baseboards around and behind the toilet. You might need to give this area a good scrubbing with a soft bristle brush. Use paper towels for this area as well.

Steam Cleaning The Bathroom
Use paper towels for toilet cleaning rather than reusable cloths, and dispose of them appropriately. Keep the tools and materials used for the toilet separate from those used on other bathroom surfaces.
Never combine toilet cleaners with other products. And for the love of all things cleaning use toilet bowl cleaner only for the toilet bowl. Follow the label instructions carefully.
Clean the Sink and Countertop
Use a suitable cleaner and a non-scratch sponge or cloth to remove toothpaste residue, soap, water spots, and everyday grime.
Pay attention to:
- The faucet and handles
- The area around the drain
- The backsplash
- The edges of the sink
- The countertop remove all toiletries
Use a small detail brush when necessary to reach tight spaces around faucet bases and other fittings.
Rinse or wipe away product residue as directed by the cleaner’s label.
Clean the Bathtub or Shower
Apply a suitable bathroom cleaner to the tub or shower surfaces. Allow it to work for the time specified on the product label, then scrub with an appropriate non-scratch tool.
Focus on:
- Soap scum
- Corners and edges
- Faucet handles and fixtures
- The area around the drain
- Grout and tile, where applicable
- Shower shelves and ledges
- The lower edges of shower doors
Use products compatible with your specific tile, grout, stone, glass, and fixture finishes. Some surfaces require gentler products than others.
Rinse thoroughly when directed by the product instructions.
Professional tip: Letting a cleaner sit for its recommended dwell time can help loosen buildup and reduce unnecessary scrubbing. Don’t assume that leaving a product on longer is always better; follow the label.
Step 5: Rinse Wet-Cleaned Surfaces
After scrubbing, rinse the sink, tub, and shower surfaces as directed by the cleaning product.
Remove loosened grime and cleaner residue so it doesn’t leave a film behind.
Pay attention to corners, ledges, and areas where product can collect. If a product is designed to be wiped away rather than rinsed, follow its specific instructions.
Sometimes you might have to get back in there and scrub again.
Step 6: Dry Surfaces and Finish the Details
Once the wet cleaning is finished, dry surfaces as appropriate with a clean microfiber cloth.
Drying can help reduce water spots and leave faucets, countertops, and other surfaces looking polished. It can also help you spot any remaining streaks or residue that need attention.
Check the areas around fixtures, the backsplash, and the edges of the countertop. These small details can make a noticeable difference in the finished result.
Use a fresh cloth when needed rather than spreading residue from one surface to another.
Step 7: Disinfect High-Touch Surfaces
Light switches and door knobs are easy to overlook during bathroom cleaning, even though they are touched frequently.
Dampen a clean cloth with an appropriate disinfectant and wipe light switches and door knobs. Follow the product label for the required contact time, and never spray liquid directly onto electrical switches.
Use a disinfectant that is suitable for the surface and follow all application instructions. A quick wipe does not necessarily disinfect a surface; the product must be used according to its label, including the required contact time.
Step 8: Clean Mirrors and Shower Glass
I leave mirrors and glass shower doors until just before cleaning the floor.
How To Keep Glass Shower Doors Clean
Use a suitable glass cleaner or another compatible glass-cleaning method. Wipe with a clean, lint-free cloth and check the glass from different angles for streaks.
For shower doors, pay attention to the edges and areas where soap residue and mineral deposits collect.
If hard-water deposits have built up, choose a treatment that is appropriate for the glass and surrounding materials. Avoid abrasive tools that could scratch the surface.
For more shower-cleaning tips, see my guide to cleaning glass shower doors.
Step 9: Clean the Floor Last
Now that the surfaces above the floor are clean, finish with the floor.
Vacuum or sweep again if necessary, then mop using a product suitable for the flooring.
Pay attention to:
- Behind the toilet
- Around the toilet base
- Under the vanity, where accessible
- Along baseboards
- Behind the door
- Corners and edges
These areas can collect dust, hair, and residue that are easy to miss during a quick cleaning.
Use only enough moisture for the flooring and cleaning method you’re using. Some floors, including certain wood and natural-stone surfaces, need specific care.
Cleaning the floor last helps remove any dust, hair, or debris that fell during the rest of the job.
Step 10: Reset the Bathroom
Once everything is clean, return the items you removed to their proper places.
- Replace towels and bath mats as needed.
- Put toiletries back neatly.
- Empty the trash if you haven’t already.
- Return cleaning supplies to storage.
- Check that the floor is safe to walk on and any wet surfaces have been handled appropriately.
- Take one final look around the room.
I like to do a quick visual check from the doorway. It’s an easy way to catch a missed spot before calling the job finished.
Common Bathroom Deep-Cleaning Mistakes to Avoid
Even a thorough cleaning can be less effective if you work against yourself. Here are a few common mistakes to avoid.
Starting With Wet Cleaning Before Removing Hair
Loose hair is easier to vacuum or sweep up when it’s dry. Starting with wet cleaning can make it stick to the floor and your tools.
Cleaning From Bottom to Top
Dust and debris can fall onto surfaces you’ve already cleaned. Work from top to bottom, leaving the floor until last.
Using the Same Tools for the Toilet and Other Surfaces
Keep toilet tools separate from the cloths and scrubbers used for the sink, countertop, tub, and shower. Use paper towels for toilet cleaning if that is your preferred method.
Using the Wrong Product for the Surface
A product that works well on one material may damage another. Always check the surface manufacturer’s guidance and the cleaning product’s label, especially for natural stone, grout, specialty finishes, and delicate fixtures.
Mixing Cleaning Products
Never mix cleaners in an attempt to make them stronger. Certain combinations can release dangerous gases or cause other hazardous reactions.
Assuming a Quick Wipe Is Enough to Disinfect
Cleaning and disinfecting are not the same thing. When disinfection is needed, use an appropriate product according to its label, including the required contact time.
Forgetting the Hidden Areas
Behind the toilet, along baseboards, around faucet bases, and under the vanity are common places for dust and grime to accumulate. Include them in your routine when they’re accessible.
Bathroom Deep-Cleaning Checklist
Before You Start
☐ Gather cleaning supplies and tools.
☐ Put on gloves and other recommended protective equipment.
☐ Provide adequate ventilation.
☐ Check product labels and surface compatibility.
☐ Remove toiletries and other items from surfaces.
☐ Pick up towels, bath mats, and trash as needed.
Dry Cleaning and Dusting
☐ Vacuum or sweep loose hair and debris.
☐ Clean corners and edges.
☐ Clean around and behind the toilet where accessible.
☐ Clean under the vanity where accessible.
☐ Dust accessible light fixtures safely.
☐ Remove dust and cobwebs from upper corners.
☐ Clean the exhaust fan cover as appropriate.
☐ Dust shelves, ledges, door frames, trim, and baseboards.
Toilet, Sink, and Shower
☐ Clean the inside of the toilet with dedicated tools.
☐ Clean the toilet exterior with paper towels and an appropriate product.
☐ Clean the toilet seat, hinges, and base.
☐ Clean the sink and countertop.
☐ Clean the faucet and handles.
☐ Clean around the drain and backsplash.
☐ Scrub the bathtub or shower.
☐ Clean shower fixtures, shelves, and ledges.
☐ Address soap scum and buildup with a compatible product.
☐ Rinse surfaces as directed by product labels.
☐ Dry surfaces as appropriate.
High-Touch Surfaces and Glass
☐ Wipe light switches with a cloth dampened with an appropriate disinfectant.
☐ Wipe door knobs with a cloth dampened with an appropriate disinfectant.
☐ Follow disinfectant contact-time instructions.
☐ Clean mirrors.
☐ Clean shower glass and door edges.
Floor and Final Reset
☐ Sweep or vacuum again if needed.
☐ Mop the floor with a suitable product.
☐ Clean behind the toilet.
☐ Clean under the vanity where accessible.
☐ Clean along baseboards and in corners.
☐ Clean behind the door.
☐ Replace towels and bath mats as needed.
☐ Return toiletries and other items to their places.
☐ Empty the trash.
☐ Do a final visual check.
Keep Your Bathroom Cleaning Routine Simple
A deep-cleaned bathroom doesn’t require dozens of products or an unnecessarily complicated routine. The biggest difference comes from working methodically, choosing the right tools, and giving attention to the areas that are easy to overlook.
Start by removing clutter and dry debris, work from top to bottom, clean the main fixtures, finish the mirrors and glass, and leave the floor until last. Following the same order each time helps make bathroom cleaning more consistent and less overwhelming.
If you’re putting together a simple, eco-conscious cleaning kit, you can browse my [Eco-Friendly Cleaning Supplies Idea List] to find tools and products that fit your routine.
A little organization goes a long way—and a reliable routine makes it easier to keep your bathroom clean between deep cleans.
Affiliate disclosure: This article may contain affiliate links. If you purchase through one of these links, I may earn a commission at no additional cost to you. I only recommend products and supplies that fit the purpose of this guide.
Helpful resources:
