

How to Clean Your Dishwasher Naturally: DIY Dishwasher Cleaner
Does your dishwasher smell a little funky, have food debris around the filter, or leave you wondering whether your dishes are getting as clean as they should? Before you blame the dishwasher, it might be time to give the appliance itself a little attention.
Even though a dishwasher cleans dishes every day, it still needs occasional maintenance. Food particles, grease, and residue can collect in the filter, around the door seals, and in other areas that don’t get much attention during a regular wash cycle.
As a professional cleaner and certified aromatherapist, I appreciate simple cleaning routines that don’t require a cabinet full of specialty products. In this guide, I’ll walk you through the basic steps for cleaning your dishwasher, including the filter, door seals, and interior.
I’ll also share the DIY vinegar and Thieves Household Cleaner method I used when I had a dishwasher of my own.
A quick note before you begin: Dishwasher materials and manufacturer recommendations vary. Check your owner’s manual and the current cleaner’s directions before using vinegar or any multipurpose cleaner inside your appliance. If either manufacturer advises against this method, follow their recommended cleaning procedure instead.
Why Clean Your Dishwasher?
Your dishwasher handles food residue, grease, and dirty dishes regularly, but that doesn’t mean every part of the appliance stays clean automatically.
Routine maintenance can help you address:
- Food debris: Small particles can collect in the dishwasher filter.
- Unpleasant odors: Trapped food residue can contribute to musty or sour smells.
- Greasy residue: Buildup may accumulate on interior surfaces over time.
- Dirty door seals: The rubber gasket and surrounding edges can collect crumbs and grime.
- Reduced cleaning performance: A clogged filter or blocked spray arms may interfere with proper water circulation.
Cleaning the appliance periodically is also an opportunity to check for standing water, damaged seals, blocked spray arms, or other issues that might need attention.
How Often Should You Clean Your Dishwasher?
There isn’t one schedule that works for every dishwasher. Your owner’s manual should be your first reference.
As a general routine, check the filter regularly and clean it whenever it needs attention. Wipe the door seals and visible edges when you notice residue, and follow the manufacturer’s recommended schedule for deeper cleaning.
If you cook frequently, wash especially greasy dishes, or notice odors, you may need to check the appliance more often.
I used to give my dishwasher a deeper cleaning a few times a year, particularly after periods of heavy use. The important thing is to keep up with routine maintenance rather than waiting until the dishwasher develops a problem.
What You’ll Need
For the basic cleaning and maintenance steps, gather:
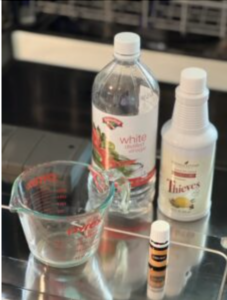
DIY Dishwasher Cleaner
- A soft cleaning cloth or microfiber cloth
- A small, soft brush suitable for cleaning the filter
- Warm water
- A little mild dish soap, if permitted for the removable filter
- A clean towel for drying
- white cleaning vinegar
- Thieves household cleaner
Supplies for Cleaning Your Dishwasher
You don’t need a cabinet full of specialty products to keep your dishwasher clean. A few simple tools, like a soft microfiber cloth, a small cleaning brush, and the right everyday cleaning products, can help you maintain your appliance without making the job complicated.
Step 1: Clean the Dishwasher Filter
If you only have time to tackle one part of your dishwasher, start with the filter.
Many dishwashers have a removable filter near the bottom of the tub. Its job is to catch food particles and debris rather than allow them to circulate through the appliance.
Here’s how to clean it:
- Turn off the dishwasher and allow the interior to cool.
- Remove the bottom rack if necessary to access the filter.
- Locate and remove the filter according to your owner’s manual. Some filters twist out, while others use a different release mechanism.
- Rinse the filter under warm running water.
- Use a soft brush to gently remove stuck-on food particles, following the manufacturer’s cleaning instructions.
- Rinse thoroughly and reinstall the filter securely.
Avoid using abrasive pads or harsh chemicals unless the manufacturer specifically recommends them. Some filters have delicate components that can be damaged by aggressive scrubbing.
While the filter is out, look for debris in the accessible filter housing and remove it carefully. Don’t disassemble parts that aren’t intended to be removed for routine cleaning.
Step 2: Wipe the Door Seals and Edges
The rubber gasket around the dishwasher door is easy to overlook. It can collect crumbs, grease, and other residue, especially around the corners and folds.
To clean it:
- Dampen a soft cloth with warm water.
- Gently wipe along the rubber gasket and the edges where the door meets the tub.
- Use a soft brush or a cloth corner to reach accessible crevices.
- Wipe away loosened dirt with a clean, damp cloth.
- Dry the area with a clean towel if recommended by the manufacturer.
Avoid pulling or stretching the gasket. Don’t use vinegar, concentrated cleaners, or essential oils on the seal unless the manufacturer confirms they are suitable for that material.
While you’re working around the door, check for visible damage or areas where the seal appears loose. A damaged gasket may need repair or replacement rather than additional cleaning.
Step 3: Wipe the Interior and Check the Spray Arms
Next, take a look inside the dishwasher.
Use a damp microfiber cloth to wipe accessible interior surfaces, including the door and the edges around the tub. If you notice stuck-on food residue, loosen it gently rather than scraping the surface with a metal tool.
Check the spray arms for visible food particles or blocked openings. Follow your manual for cleaning them, since removal procedures vary by model.
Make sure the spray arms can move freely and aren’t obstructed by the racks or other items.
If your dishwasher has persistent standing water, unusual noises, damaged parts, or poor cleaning performance after routine maintenance, consult the manual or a qualified appliance technician.
Step 4: My DIY Dishwasher Cleaning Method
When I had a dishwasher, I used a simple combination of white vinegar and Thieves Household Cleaner for occasional interior cleaning.
My preferred method was to place the ingredients in a glass measuring cup on the top rack and run a regular cycle. I also tried pouring the mixture directly into the bottom of the dishwasher, but the measuring-cup method worked better in my particular situation.
That was my personal experience with my own stainless-steel-interior dishwasher. I can’t confirm that the same method is suitable for every appliance, so check the manufacturer’s guidance before trying it.
DIY Dishwasher Cleaner
Ingredients
Directions
- Make sure the dishwasher is empty.
- Check that your dishwasher manufacturer permits vinegar and that the current Thieves product directions permit the intended use.
- If the combination is approved, place the measured ingredients in a dishwasher-safe glass measuring cup and position it securely on the top rack, following the appliance instructions.
- Run the cleaning cycle recommended by the manufacturer.
- When the cycle finishes, inspect the interior and wipe away any remaining visible residue with a clean cloth if needed.
Do not add regular dishwasher detergent to a dedicated cleaning cycle unless the instructions specifically call for it. Never mix cleaning products unless their manufacturers confirm that the combination is appropriate.
A note about vinegar: Although vinegar is a familiar household cleaning ingredient, its acidity can affect certain appliance components over time. Some manufacturers recommend against using it in dishwashers. If your manual advises against vinegar, leave it out and choose an approved dishwasher-cleaning product instead.
You don’t need to add essential oils to this recipe. They aren’t necessary for routine dishwasher maintenance, and adding them introduces another ingredient whose compatibility with the appliance would need to be established.
Step 5: Run a Final Check
Once you’ve finished cleaning, take a moment to check your work.
- Is the filter correctly installed?
- Are the spray arms unobstructed?
- Have you removed visible food debris?
- Are the door seals clean and intact?
- Is there any unusual standing water or a persistent odor that needs further investigation?
Follow the manufacturer’s instructions for any additional cleaning cycle or maintenance step.
If the dishwasher still smells unpleasant or isn’t cleaning dishes properly, the problem may require more than a routine cleaning. Check the troubleshooting section of your manual before trying stronger homemade mixtures.
Keep Your Dishwasher Clean With Simple Maintenance
You don’t need an elaborate cleaning routine to look after your dishwasher. Checking the filter, wiping the door seals, and removing visible debris are practical steps that can make appliance maintenance much easier.
My approach to cleaning has always been to keep things simple, use products thoughtfully, and avoid buying specialty products when a straightforward method will do the job.
The key is choosing methods that are suitable for your particular appliance. A little routine maintenance is a better starting point than experimenting with increasingly complicated cleaning recipes.
Have you found a simple way to keep your dishwasher fresh and clean? I’d love to hear what has worked for you.
Some links on this website are affiliate links, which means I may earn a commission if you make a purchase through them. This does not change the price you pay.
As an Amazon Associate, I earn from qualifying purchases.
The information in this article is for general educational purposes. Always follow your appliance manufacturer’s maintenance instructions and the directions supplied with any cleaning product.
