
The Ultimate Guide to Choosing the Best Carrier Oil for DIY Reed Diffusers
What Is the Best Carrier Oil for a Reed Diffuser?
Reed diffusers are one of my favorite ways to add fragrance to a room without a candle, plug-in, or electric diffuser. They’re simple, attractive, and once they’re set up, they quietly release fragrance into the room for weeks.
But if you’ve ever tried making your own reed diffuser, you may have discovered that not every oil works equally well.
So what is the best carrier oil for a reed diffuser?
The short answer: If you specifically want to use a natural carrier oil, I would start with fractionated coconut oil because it is lightweight, stays liquid at room temperature, and has very little scent of its own.
However, there’s an important distinction worth making: a purpose-made reed diffuser base is often a better choice if your priority is strong, consistent scent throw. Reed diffuser bases are formulated specifically to travel up the reeds and evaporate into the air. A carrier oil that works beautifully in a skin-care blend isn’t automatically a good diffuser base.
Let’s take a closer look.
How Does a Reed Diffuser Work?
A reed diffuser is a surprisingly simple little system.
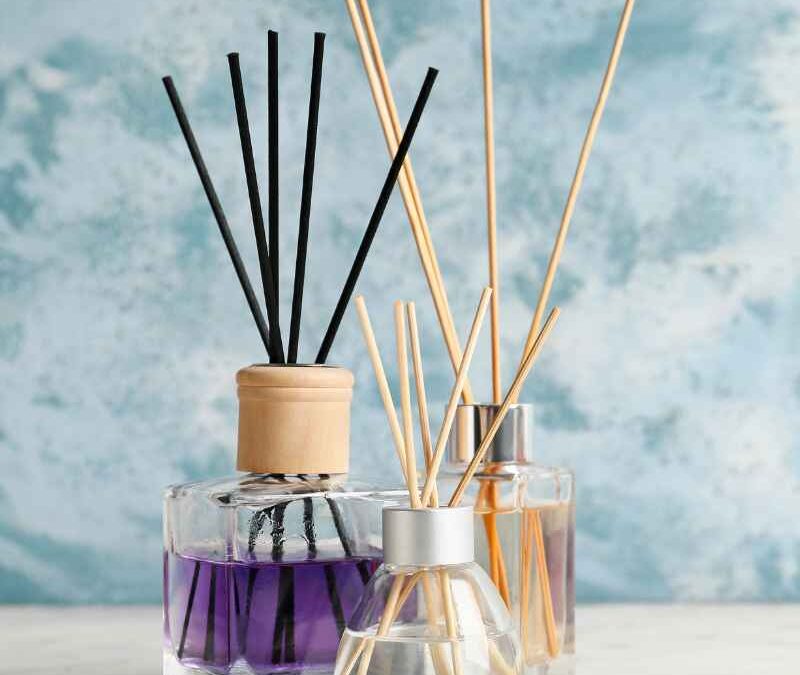
You have a container filled with a scented liquid and several porous reeds. The reeds sit in the liquid and gradually draw it upward. Once the scented liquid reaches the exposed portion of the reeds, it evaporates into the surrounding air.
This means the liquid needs to be able to travel through the reeds.
That’s why the type of base you use matters so much.
A carrier oil can dilute essential oils, but the best carrier for topical aromatherapy isn’t necessarily the best carrier for a reed diffuser.
Carrier Oil vs. Reed Diffuser Base
This is where a lot of DIY reed diffuser recipes get confusing.
In aromatherapy, we usually use the term carrier oil to describe a vegetable oil used to dilute essential oils for topical use. Jojoba, sweet almond, coconut, and many other plant oils are examples of carrier oils. Aromatics International, for example, describes its carrier oils primarily in terms of topical aromatherapy and skin care.
A reed diffuser base, on the other hand, is designed specifically for home fragrance.
Its job is to:
- carry fragrance up the reeds
- provide good wicking
- evaporate at a useful rate
- allow the fragrance to disperse into the room
If you’ve tried making a reed diffuser with a heavy carrier oil and found that the reeds barely seem to absorb anything, the base may be the problem.
But if you’re specifically interested in making a simple, natural-oil version, there are a few oils that are more suitable than others.
The Best Natural Carrier Oils for Reed Diffusers
1. Fractionated Coconut Oil
Fractionated coconut oil is the natural carrier oil I would try first for a DIY reed diffuser.
Unlike regular coconut oil, fractionated coconut oil stays liquid at room temperature. It is also very light and has little to no noticeable scent, which means it won’t compete as much with the essential oils you’re using.
It’s a popular choice for DIY projects because it is easy to find and doesn’t have the strong scent that some unrefined plant oils can have.
Best for: Someone who wants a simple, lightweight, natural-oil base.
My Fractionated Coconut Oil Choice
2. Safflower Oil
Safflower oil is another lightweight vegetable oil that can be considered for a DIY reed diffuser.
If you choose safflower oil, look for one that is relatively light and has a mild aroma so that it doesn’t overpower your essential oil blend.
Because natural oils can vary by product and formulation, I recommend making a small test batch first rather than filling a large diffuser bottle.
Best for: Experimenting with a lightweight plant-based carrier.
3. Sweet Almond Oil
Sweet almond oil is a popular aromatherapy carrier oil and is relatively mild in aroma.
It can be used in DIY fragrance projects, but remember that sweet almond oil is primarily a skin-care carrier oil, not a purpose-made reed diffuser base.
If you already have some on hand, it may be worth experimenting with a small batch. I wouldn’t buy a large bottle specifically for reed diffusers without testing how well it wicks through your particular reeds first.
Aromatics International describes its sweet almond oil as nearly odorless and primarily recommends it for applications such as skincare and massage.
Best for: DIY experimentation when you already have sweet almond oil available.
What About Jojoba Oil?
Jojoba oil is one of my favorite carrier oils for topical aromatherapy, but that doesn’t mean it’s my first choice for a reed diffuser.
Jojoba is actually a liquid wax rather than a conventional vegetable oil, and one of its biggest advantages in aromatherapy is its exceptional stability and long shelf life. Aromatics International currently lists a shelf life of approximately 20 years for its jojoba oil.
Those are wonderful qualities for a skin-care carrier.
But reed diffusers have a different job.
You need the liquid to travel efficiently through the reeds and evaporate into the room. A heavier, more viscous carrier can be less effective for this purpose.
So while I love jojoba for many aromatherapy applications, I wouldn’t choose it as my first carrier for a reed diffuser.
This is a good example of why the “best carrier oil” depends on what you’re actually trying to do with it.
Oils I Wouldn’t Choose for a Reed Diffuser
Some oils are wonderful for other DIY projects but aren’t my first choice for reed diffusers.
Olive Oil
Olive oil is relatively heavy and has its own characteristic aroma. I’d save it for the kitchen and other applications where it’s actually intended to be used.
Castor Oil
Castor oil is much too thick for what we’re trying to accomplish with a reed diffuser.
Regular Coconut Oil
Regular coconut oil can solidify or become cloudy depending on temperature, which isn’t exactly what we want in a passive diffuser.
Jojoba Oil
As I mentioned above, jojoba is an excellent topical carrier, but its stability and skin-care benefits don’t make it the obvious choice for reed diffusion.
The basic rule is simple:
If the oil is thick, strongly scented, or likely to solidify at room temperature, it’s probably not the carrier I’d reach for first.
Do You Have to Use a Carrier Oil?
No!
And this is one of the biggest things I would have done differently in my original article.
If your goal is to make a good-performing reed diffuser, you may actually be better off purchasing a reed diffuser base specifically formulated for this purpose.
A dedicated diffuser base is designed around the way the fragrance needs to move through the reeds and evaporate. That can make a noticeable difference in scent throw and overall performance.
If you’re making a diffuser as a fun DIY project and want to experiment with natural ingredients, a lightweight carrier oil can be worth trying.
If your priority is performance, I’d start with a purpose-made diffuser base.
Get unscented reed diffuser oil here
Choosing Your Reed Diffuser Reeds
The liquid isn’t the only thing that matters.
The reeds are responsible for moving the scented liquid from the bottle into the air, so they deserve some attention too.
Look for reeds specifically designed for reed diffusers. Natural rattan reeds are commonly used because their structure allows the liquid to travel upward through tiny channels.
You can experiment with the number of reeds as well.
More reeds generally means more fragrance released into the room—but it also means your diffuser will use the liquid more quickly.
Start with fewer reeds and add more if you want a stronger scent.
How to Make a Simple DIY Reed Diffuser
One stop shop for all your DIY reed diffuser supplies
Once you’ve chosen your base, you’ll need:
- A small glass reed diffuser bottle
- Reed diffuser reeds
- A lightweight carrier oil or purpose-made diffuser base
- Essential oils or an appropriate fragrance oil
- A small funnel
- Measuring supplies
Step 1: Choose Your Bottle
A bottle with a relatively narrow opening works well because it limits how much of the liquid is exposed to the air outside of the reeds.
Glass is a good choice for a DIY diffuser.
Step 2: Add Your Base
Fill your bottle with your chosen diffuser base or carrier oil.
Don’t fill it completely to the top. Leave enough room to insert the reeds without overflowing the bottle.
Step 3: Add Your Fragrance
Add your essential oils or fragrance according to the instructions for your chosen diffuser base.
This is one place where I don’t recommend blindly following a random recipe online.
Different bases and fragrance materials can have different recommended usage rates. If you’re using a commercial fragrance oil, follow the manufacturer’s directions and any applicable safety guidance.
Step 4: Add the Reeds
Place your reeds into the bottle and allow them to soak up the liquid.
After they’ve had time to absorb the liquid, you can flip the reeds so that the saturated ends are exposed.
Be careful when flipping them because the liquid can drip onto furniture or other surfaces.
How to Get More Scent From Your Reed Diffuser
If your diffuser isn’t producing as much fragrance as you’d hoped, don’t immediately add more essential oil.
There are several things you can check first.
Try More Reeds
Adding additional reeds increases the amount of surface area available for evaporation.
Flip the Reeds
Flipping the reeds can refresh the exposed scented ends and temporarily increase fragrance.
Check Your Base
If you’re using a homemade carrier-oil mixture, the base may simply be too heavy for your reeds.
A purpose-made diffuser base may perform better.
Check the Location
Air movement can help distribute fragrance throughout a room, but placing the diffuser directly beside a heat source or in strong direct sunlight can cause the liquid to evaporate more quickly.
Give It Time
A reed diffuser doesn’t work like a spray air freshener. It’s designed to provide a slower, more continuous release of fragrance.
Sometimes a little patience is all you need.
How Long Does a Reed Diffuser Last?
There isn’t one universal answer.
How long your diffuser lasts depends on things like:
- the size of the bottle
- the number of reeds
- the type of base
- the fragrance concentration
- room temperature
- airflow
- humidity
- how often you flip the reeds
A diffuser with more reeds and stronger airflow may use its liquid much faster than one sitting quietly in a small room.
That’s another reason I recommend experimenting with a small batch first.
Reed Diffuser Safety
Reed diffusers may look harmless sitting on a shelf, but the liquid inside can contain concentrated essential oils, fragrance materials, alcohol, or other ingredients that shouldn’t be swallowed.
Keep your diffuser out of the reach of children and pets, and place it somewhere it cannot easily be knocked over.
Essential oils can be dangerous to pets when they are exposed to concentrated oils, and ASPCA recommends keeping oils out of pets’ reach.
If you have pets with respiratory problems or birds in the home, it’s especially important to research the specific risks before using essential-oil-based fragrance. ASPCA notes that birds have particularly sensitive respiratory systems.
Also remember that reed diffuser liquid can damage some furniture finishes. If you spill it, clean the area promptly.
Never ingest a reed diffuser mixture.
If a child or pet swallows diffuser liquid, contact an appropriate poison-control or veterinary service for guidance rather than trying to manage the exposure yourself.
So, What Is the Best Carrier Oil for a Reed Diffuser?
If you specifically want to make a reed diffuser using a natural carrier oil, I’d start with fractionated coconut oil.
It’s lightweight, stays liquid at room temperature, and has very little scent of its own.
But if you’re looking for the best-performing option overall, don’t limit yourself to traditional aromatherapy carrier oils. A purpose-made reed diffuser base may give you better and more consistent results because it is formulated specifically for wicking and evaporation.
And that’s really the most important lesson:
The best carrier oil for a reed diffuser isn’t necessarily the best carrier oil for your skin.
Choose your base based on the job you want it to do.
Want to Make Your Own Reed Diffuser?
I’ve put together a collection of reed diffuser supplies and ingredients to make it easier to get started, from diffuser bottles and reeds to oils and other useful supplies.
Shopping list to make your own DIY reed diffuser
Some links on this page are affiliate links, which means I may earn a commission if you make a purchase through them. This does not change the price you pay.
A Safety Note About Essential Oils
Essential oils are highly concentrated plant products. They aren’t automatically safer simply because they come from plants.
Use essential oils according to the manufacturer’s recommendations, and keep concentrated oils and diffuser mixtures away from children and pets.
Have fun creating a life that naturally makes scents! 🌿
The information provided here is intended for educational purposes only and is not a substitute for professional medical advice, diagnosis, or treatment. Essential oils are potent natural compounds that can offer various benefits when used appropriately.
Some of the links on this website are affiliate links, which means that we may earn a commission if you click on the link or make a purchase using the link. When you make a purchase, the price you pay will be the same whether you use the affiliate link or go directly to the vendor’s website using a non-affiliate link. By using the affiliate links, you are helping support our website, and we genuinely appreciate your support.
