A Super Simple DIY Natural Body Butter Recipe
There is something wonderful about making your own skincare products. You get to choose the ingredients, customize the scent, and know exactly what you’re putting into your homemade creations.
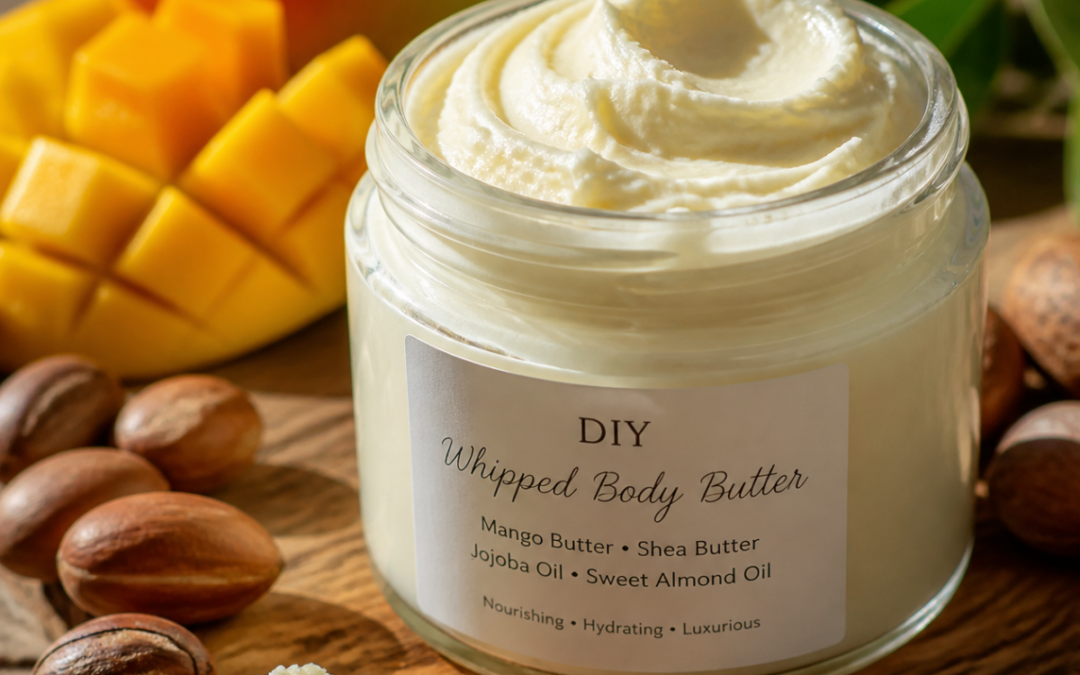
This whipped mango and shea butter is a lovely place to start if you’re interested in making your own natural body care products. It combines two rich plant butters with nourishing carrier oils to create a soft, whipped body butter that melts as you massage it into your skin.
The best part? You can keep it completely unscented, add a little natural vanilla warmth, or customize it with your favorite essential oil combinations.
I’m sharing the original recipe from Aromatics International, along with a few ideas from Green Roots Botanicals for making it your own.
Let’s get whipping!
Why Make Your Own Mango & Shea Body Butter?
Mango butter and shea butter are wonderful ingredients to explore when making homemade skincare.
Both are plant-based butters that provide a rich, creamy consistency. Combined with lightweight liquid carrier oils, they create a luxurious body butter without the need for complicated ingredients.
Here is a little more about the ingredients in this recipe.
Mango Butter
Mango butter is extracted from the kernels of the mango fruit. It has a creamy texture and is commonly used in homemade body butters, lotions, and balms.
It helps give this recipe its smooth consistency and makes a lovely base for a whipped skincare product.
Shea Butter
Shea butter comes from the nuts of the shea tree and has been used in traditional skincare preparations for generations.
It adds richness and creaminess to homemade body butter. It also helps give the finished product that lovely buttery texture.
Sweet Almond Oil
Sweet almond oil is a popular carrier oil for skincare. It has a smooth feel and helps soften the consistency of homemade body products.
If you have a known almond allergy, choose an appropriate alternative carrier oil instead.
Apricot Kernel Oil
Apricot kernel oil is a lightweight carrier oil that blends nicely with plant butters. It helps create a softer, more spreadable finished product.
Jojoba Oil
Jojoba oil is actually a liquid wax ester rather than a traditional vegetable oil. Its composition is similar in some ways to the natural oils found on our skin.
It is a versatile ingredient in homemade skincare and works beautifully in this recipe.
Ingredients for Whipped Mango & Shea Body Butter
This recipe is adapted from the Whipped Mango & Shea Body Butter recipe at Aromatics International.
Ingredients:
- 3.6 oz (102 g) mango kernel butter
- 1.6 oz (45 g) shea butter
- 1.2 oz (34 g) sweet almond oil
- 0.8 oz (23 g) apricot kernel oil
- 0.8 oz (23 g) jojoba oil
- Up to 10 drops of essential oils (optional, following the original recipe’s suggested amount)
- A clean container for storing your finished body butter
A digital kitchen scale is helpful for measuring the ingredients accurately.
Want to add a little vanilla?
Here is one of my favorite ways to customize this recipe.
Instead of using only regular jojoba oil, try substituting some or all of it with Vanilla Infused Jojoba Oil from Aromatics International.
This beautiful infusion combines organic jojoba oil with unsprayed Madagascar vanilla oleoresin. The result is a warm, naturally sweet vanilla aroma.
You can start by replacing half of the jojoba oil with the vanilla-infused version and adjust from there depending on how much vanilla fragrance you prefer.
Just keep the total amount of jojoba oil the same as the original recipe.
How to Make Whipped Mango & Shea Body Butter
The process is relatively simple, although allowing time for the melted butters to cool is important.
Step 1: Weigh your ingredients
Measure all your ingredients before getting started. Having everything ready makes the process much easier.
Step 2: Melt the butters
Step 2: Melt the butters
Place the mango butter and shea butter in a double boiler. Heat gently until both butters are completely melted, stirring occasionally. Avoid overheating.
Step 3: Cool the mixture
Place the melted butters in the refrigerator until they begin to firm up but are still soft enough to whip.
Step 4: Whip until fluffy
Using a hand mixer, whip the softened butter mixture until it becomes light and airy.
Step 5: Add the carrier oils
Slowly incorporate the sweet almond oil, apricot kernel oil, and jojoba oil while continuing to mix.
If you’re using vanilla-infused jojoba, this is where it goes!
Whip again until everything is thoroughly combined.
Step 6: Add essential oils (optional)
If you’re making a scented version, add your chosen essential oil blend during the final whipping stage.
Step 7: Transfer to containers
Spoon your finished body butter into clean, dry containers.
Allow it to rest for approximately 24 hours before using.
For the original recipe and its accompanying instructions, visit Aromatics International.
Three Essential Oil Blends to Customize Your Body Butter
One of the things I love about making your own skincare products is that you aren’t limited to one fragrance.
You can create something warm and comforting, a soft floral blend, or something fresh and citrusy.
Here are three Green Roots Botanicals scent ideas to try!
The following blends use the original recipe’s suggested maximum of 10 drops of essential oils for the entire batch. They are suggested aromatic combinations, not individually safety-assessed formulations for every skin type. Always check the supplier’s dermal-use guidance for each oil.
1. Warm Vanilla
If you love warm, sweet fragrances, this is a lovely combination.
We’ll use the vanilla-infused jojoba oil as our foundation, with a little sweet orange and cedarwood to complement the natural vanilla aroma.
Ingredients:
- Substitute vanilla-infused jojoba oil for some or all of the regular jojoba oil.
- 6 drops sweet orange essential oil
- 4 drops cedarwood essential oil
The sweet orange adds a little brightness, while cedarwood brings a warm, woody quality to the blend.
The vanilla gives everything a soft, comforting fragrance.
Find Vanilla Infused Jojoba Oil at Aromatics International.
2. Sweet Dreams
This is a beautiful floral-citrus combination for anyone who enjoys softer, more delicate fragrances.
Ingredients:
Lavender gives this blend its familiar floral character. Sweet orange adds a gentle sweetness, while ylang ylang contributes a rich, exotic floral note.
I think this would be especially lovely as part of an evening self-care routine.
3. Summer Glow
For something fresh and cheerful, try this sunny combination.
Ingredients:
- 6 drops sweet orange essential oil
- 3 drops petitgrain essential oil
- 1 drop ylang ylang essential oil
Sweet orange brings a bright citrus aroma, petitgrain adds a fresh green quality, and ylang ylang rounds everything out with a little floral sweetness.
It’s a lovely combination for anyone who enjoys fresh, uplifting fragrances.
A Few Important Essential Oil Safety Tips
Before adding essential oils to homemade skincare, take a little time to research the oils you plan to use.
Essential oils are highly concentrated plant extracts. Just because an ingredient is natural doesn’t automatically mean it is appropriate for every person or every skin type.
There are a few things I always encourage people to consider.
Research Phototoxicity Before Using Essential Oils on Your Skin
Some essential oils can increase your skin’s sensitivity to ultraviolet light. This is called phototoxicity.
Certain expressed citrus oils are particularly important to research before including them in leave-on skincare products.
For example, expressed bergamot, cold-pressed lime, and cold-pressed lemon can present phototoxicity concerns. Extraction method matters, and some oils have safer alternatives, such as steam-distilled or FCF (furanocoumarin-free) versions.
Don’t assume all citrus essential oils have the same safety profile.
Before using an essential oil in a body butter, research its botanical name, extraction method, phototoxicity information, and recommended dermal limits.
A good starting point is the National Association for Holistic Aromatherapy’s safety information.
Always Perform a Patch Test
This is something I really don’t want people to overlook!
We all have different skin types, sensitivities, and individual responses to ingredients.
An essential oil blend that works beautifully for one person might cause irritation for someone else.
Before applying your finished body butter more generously, apply a small amount to a small area of skin, such as your inner forearm.
Observe the area over the next 24–48 hours. If you experience redness, itching, irritation, or discomfort, discontinue use.
If you have particularly sensitive skin, known allergies, or concerns about using essential oils topically, consider consulting a qualified healthcare professional or aromatherapist before experimenting.
And remember, you can always leave the essential oils out entirely. The original mango and shea butter recipe is lovely as an unscented option, too.
Storing Your Homemade Body Butter
Once you’ve made your body butter, you’ll want to store it properly.
A few simple precautions can help protect your finished product:
- Use clean, completely dry containers.
- Keep water out of your body butter.
- Avoid introducing moisture by using wet fingers.
- Store in a cool location away from direct sunlight and excessive heat.
- Pay attention to the shelf life of your ingredients.
Aromatics International notes that the ingredient with the shortest shelf life determines the shelf life of the finished recipe.
Because this is a homemade product without a water-based preservative system, cleanliness and dry storage are especially important. Discard it if you notice an unexpected change in smell, color, or texture.
Where to Find Ingredients for Your DIY Body Butter
If you’d rather not source every ingredient separately, Aromatics International offers the original recipe and an accompanying ingredient bundle.
I enjoy working with Aromatics International because they offer a wide selection of essential oils, carrier oils, and ingredients for people who enjoy making their own natural products.
Here are a couple of ways to get started:
Option 1: The original Whipped Mango & Shea Body Butter recipe
Visit Aromatics International’s recipe page to see their original instructions and ingredient bundle.
Option 2: Shop Individual Ingredients & DIY Supplies on Amazon
Prefer to purchase your ingredients individually? I’ve put together an Amazon Idea List with the butters, carrier oils, essential oils, and helpful equipment for making your own whipped body butter.
You’ll also find useful supplies like a hand mixer, digital kitchen scale, double boiler, cosmetic jars, and piping bags.
This is a good option if you already have some supplies at home and just need a few additional ingredients to get started.
Shop My DIY Whipped Body Butter Ingredients & Supplies on Amazon
Final Thoughts
I love the idea of making your own body butter because it gives you so much room to experiment.
You can keep things simple with the original unscented recipe, add a little natural vanilla warmth, or create your own essential oil combinations depending on the fragrances you enjoy.
And don’t feel like you need a cabinet full of ingredients to get started. A few good-quality butters and carrier oils can go a long way when you’re exploring homemade skincare.
Start with the basic recipe, experiment thoughtfully, and find the combination that you enjoy most.
Have fun creating a life that naturally makes sense!
Affiliate disclosure: This post contains affiliate links. If you make a purchase through one of my links, I may earn a small commission at no additional cost to you. Thank you for supporting Green Roots Botanicals and helping me continue sharing natural living ideas and DIY recipes!
Disclaimer: This article is for educational purposes and is not intended to diagnose, treat, or prevent any medical condition. Essential oils and homemade skincare ingredients can cause adverse reactions. Research ingredients carefully and use them according to appropriate safety guidelines.
